GeoJot+ is an annual subscription service comprised of 3 components: The Administator's Dashboard, the Mobile App, and Core. Below is a quickstart guide for the GeoJot+ Mobile App. This allows you to quickly get started using the app with our Sample - Demo list. Please see our other task specific help pages for the GeoJot+ mobile app, as well as our help videos. There is also context sensitive help for each screen within the app.
GeoJot+ Mobile App for Apple Devices
- Activate GeoJot+ on your Apple device:
When you first open the app type your Name, Email address, and Serial Number on the Activation Screen, then choose . Next select . The home screen will now appear.
- Take a photo:
On the home screen, select . Then select to take your photo.
- Enter information about the photo:
The Sample - Demo list will appear. Click on any of the attributes (size, condition, etc) and select a value or type in information. When you are done entering all your attributes, select . The camera screen will appear again.
- See the photo:
Select along the bottom of your screen. Click on your photo thumbnail. Then toggle to see the larger photo, the photo on a map, or the attributes for the photo.
- Review your photo and data, create reports-maps-database output:
Select to email the photo to yourself. Check out the context sensitive help to see how to automatically upload your photos to the cloud if you have subscribed to the Team Level. Import your photos into GeoJot+ Core on your computer to create reports, ArcGIS & Google Maps, or database input with the photos and attributes.
**Click help ion on most screens to see context sensitive help.
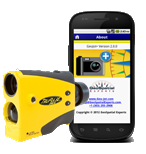
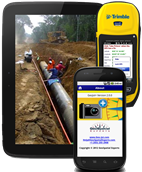
GeoJot+ Mobile App for Android Devices
- Activate GeoJot+ on your Android device:
When you first open the app type your Name, Email address, and Serial Number on the Activation Screen, then choose . Next select . The home screen will now appear.
- Take a photo:
On the home screen, select . Then select to take your photo.
- Enter information about the photo:
The Sample - Demo list will appear. Click on any of the attributes (size, condition, etc) and select a value or type in information, then select . When you are done entering all your attributes, select . The camera screen will appear again.
- See the photo:
Select along the bottom of your screen. Click on your photo thumbnail. Then toggle to see the larger photo, the photo on a map, or the attributes for the photo.
- Review your photo and data, create reports-maps-database output:
Select Menu, then Send and email the photo to yourself. Check out the context sensitive help to see how to automatically upload your photos to the cloud if you have subscribed to the Team Level. Import your photos into GeoJot+ Core on your computer to create reports, ArcGIS & Google Maps, or database input with the photos and attributes.
**Click on the Menu button on most screens to see help and other options.
|